

How To Install Brick Pavers Youtube
How to Install Pavers
When it comes to DIY projects, a paver installation isn't a quick or easy process, simply the results are well worth your time. Whether you lot're making small landscaping improvements to a rented property or need a condom, level place to grill, pavers make a great selection. This guide covers everything yous need to know to install pavers like your local professionals in Southern California. For other states and areas, brand certain to research local requirements before starting your installation. Watch the video below and so follow the written steps to install pavers at your own home.
What Nosotros'll Embrace:
- Tools
- Materials
- Paver Installation Guide
- Preparing the Expanse
- Placing the Foundation
- Installing Pavers
- Installing Edging
- Adding and Compacting Joint Sand
- Cleaning and Sealing
- Shovel
- Tape Measure
- Landscaping Rake
- Tamper or Plate Compactor
- Rubber Mallet
- Hammer
- Wheelbarrow
- Circular Saw with Physical Blade
- Push button Broom
- Garden Hose
- Level
- Speed Square
- String Line
- Stakes
- Heart Protection
- Hearing Protection
Materials:
- Pavers
- Grade II Road Base of operations
- Geotextile Fabric
- Bedding Sand
- Concrete
- Joint Sand
- Sealer
1. Gear up the Area
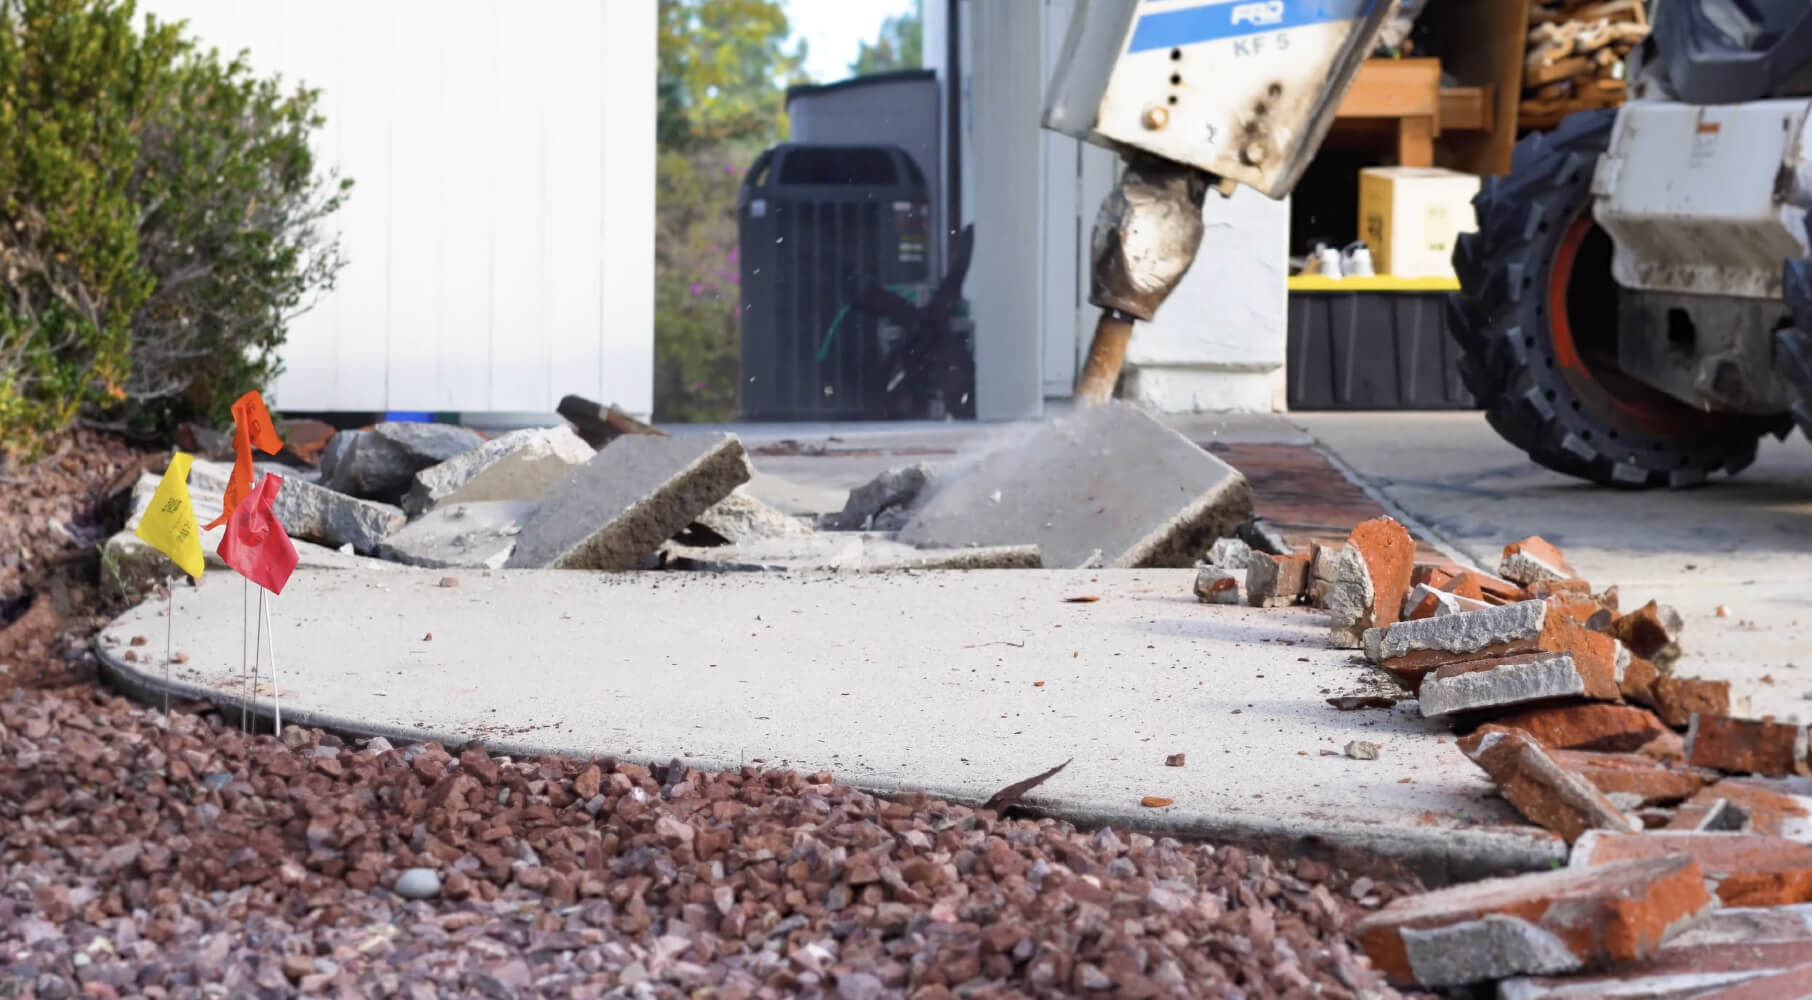
Pre-Demolition
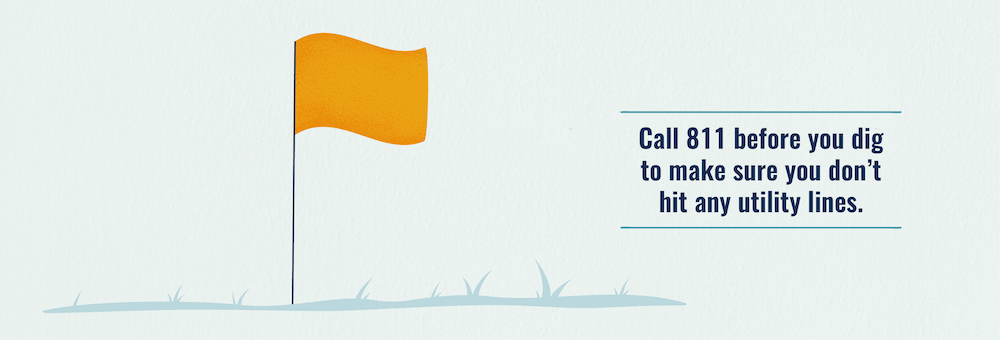
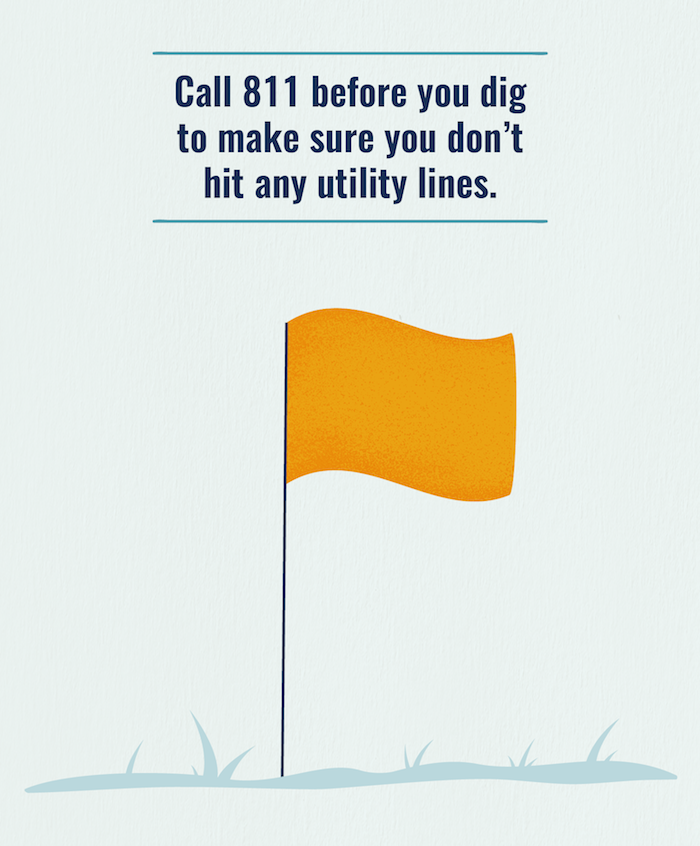
After gathering the tools and materials yous demand for your project, it'southward fourth dimension to prepare the area where you plan to lay your pavers. It's e'er a good idea to call 811 before you dig, to make sure that you don't accidentally impairment cached gas, water or electrical lines.
Demolition & Excavation
In the area where you volition lay your pavers, remove any grass or existing hardscape surfaces, making sure to not striking any utility lines.
- For vehicular areas similar driveways, excavate nine ½ inches from the end of the graded slope.
- For pedestrian areas, excavate seven ½ inches from the end of the graded slope.
- For an RV area or commercial vehicle area, excavate eleven ½ inches from the end of the graded slope.
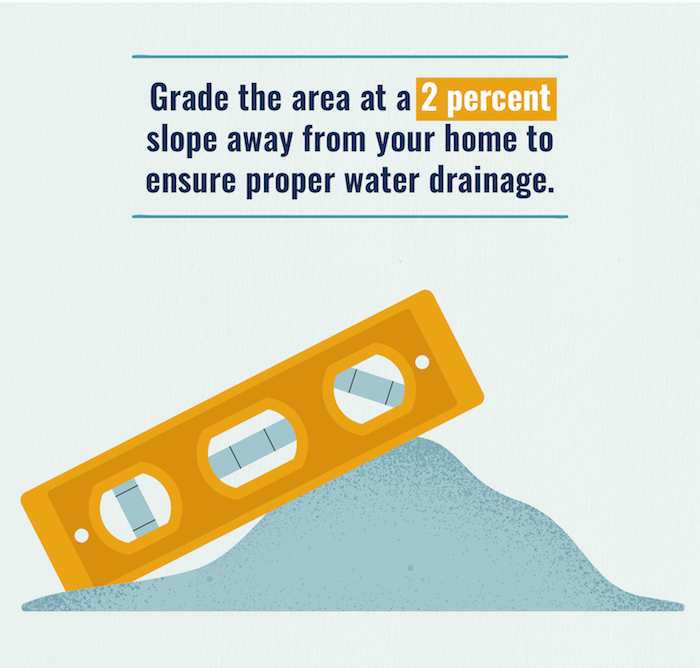
Grade the Expanse
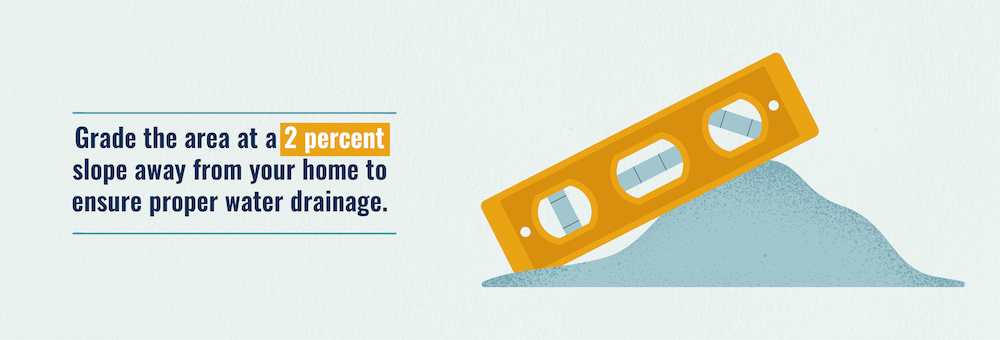
After y'all've removed any grass or hardscape, utilize a level to class the expanse at a 2 percent slope to ensure proper water drainage away from your domicile. Y'all may accept to build up depression areas with soil or remove soil in as well tall areas to achieve the desired gradient. For the kickoff 4 feet abroad from the house, you want a 1/4 inch of fall per foot for the first four feet, and 1/8 inch of fall per foot thereafter.
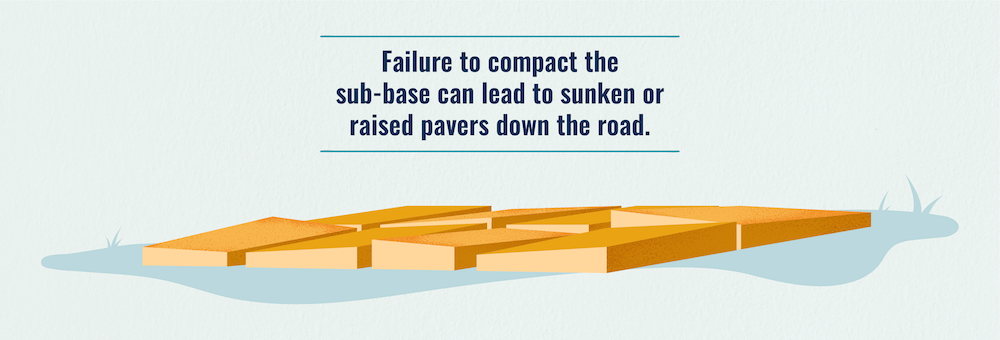
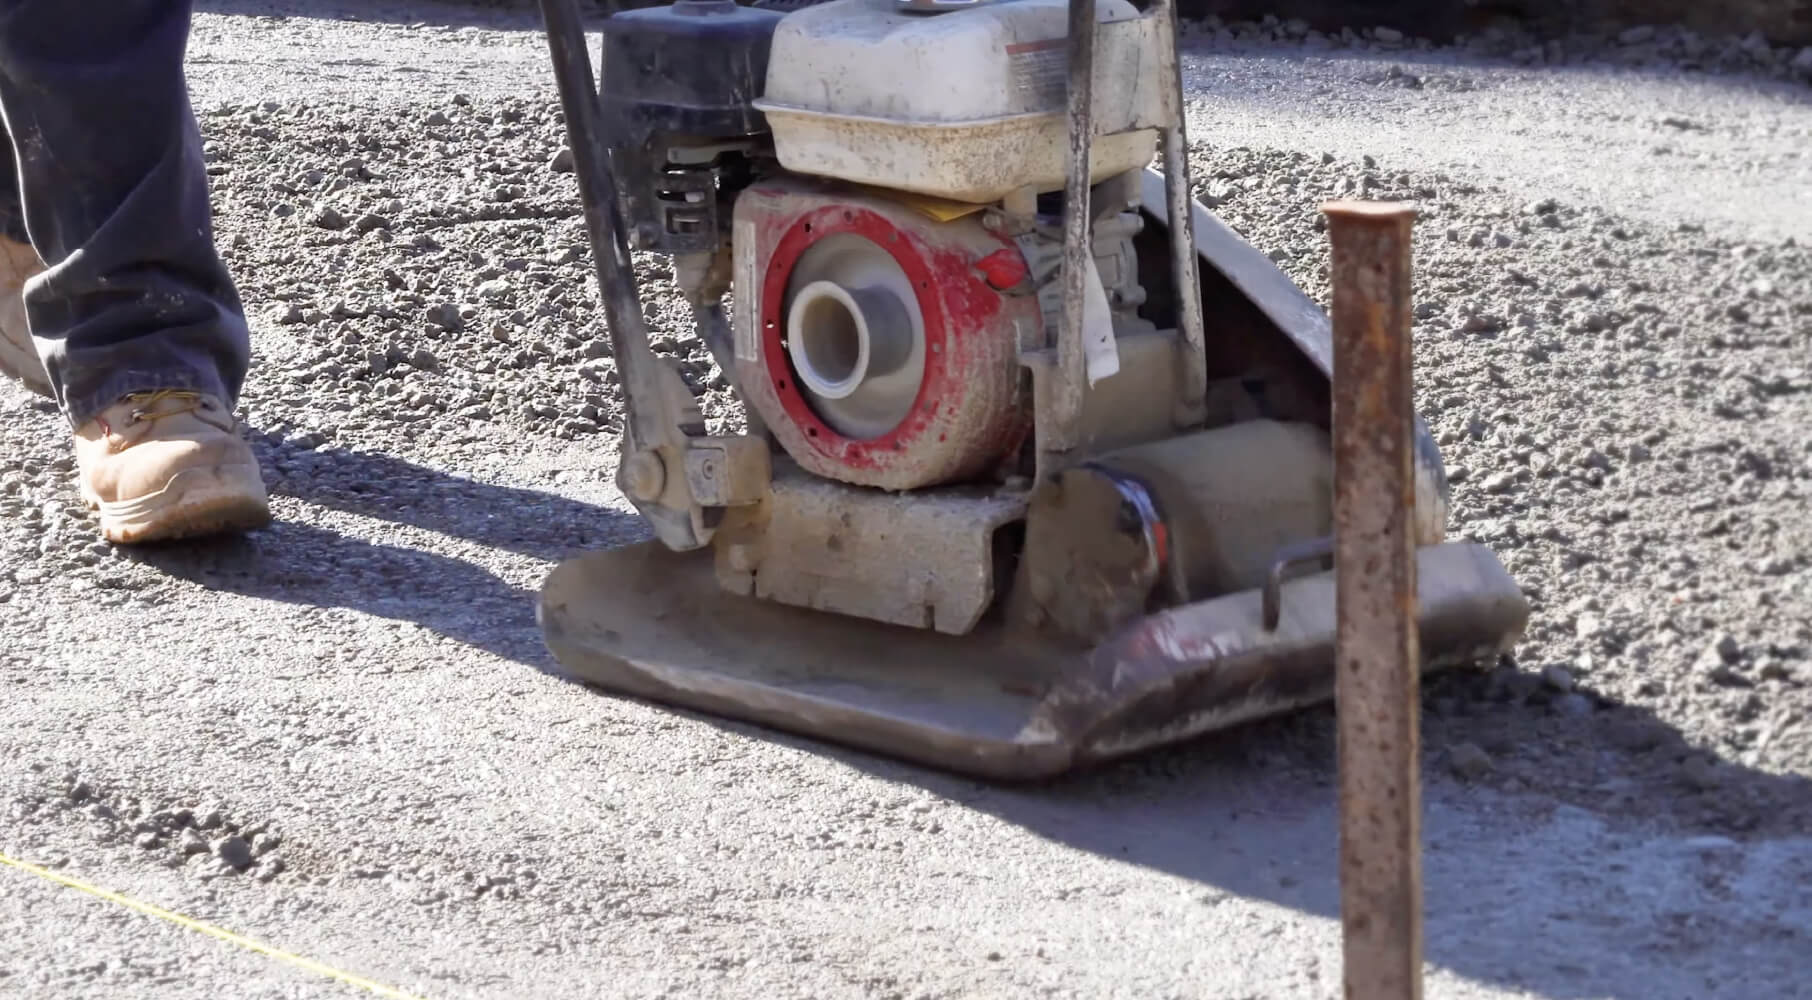
Meaty the Sub-base
A strong sub-base is essential to a long-lasting, structurally sound paver installation. Using your tamper or plate compactor, compact the soil or gravel where your pavers will get. This crucial step ensures that there won't be any unwanted air gaps in your system. Failure to compact a sub-base can lead to sunken or raised pavers further downward the route.

Install the Geotextile Fabric
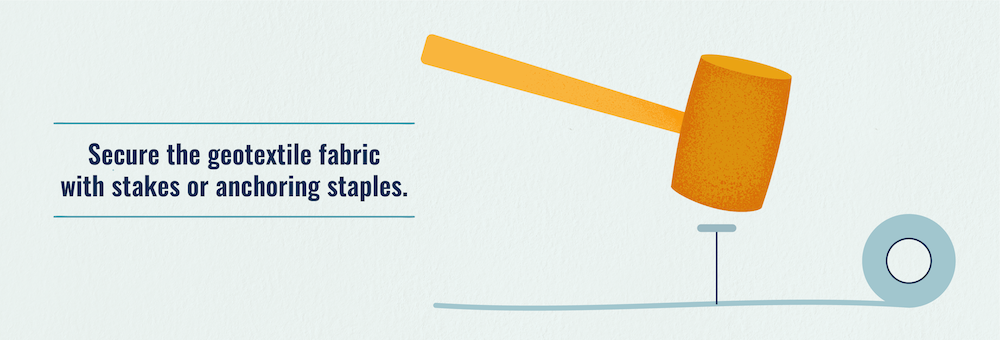
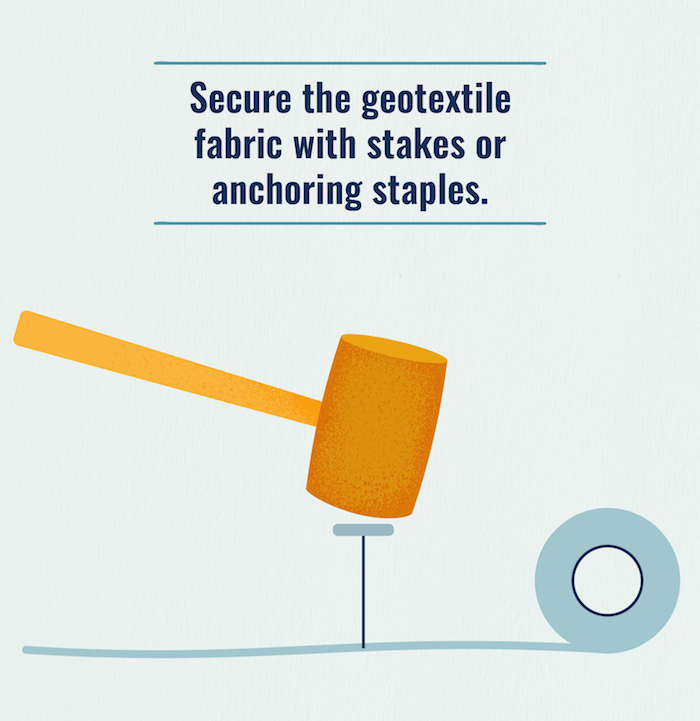
Using geotextile cloth is strongly recommended – specially for areas with the clay soil normally found in Southern California. To install, roll out your geotextile textile and cut it to match the shape of your paver projection. This will protect your foundation from the underlying soil. If needed, overlap adjoining pieces of fabric. Secure the textile with your stakes or geotextile fabric anchoring staples.
2. Place the Foundation
Prepare Road Base of operations
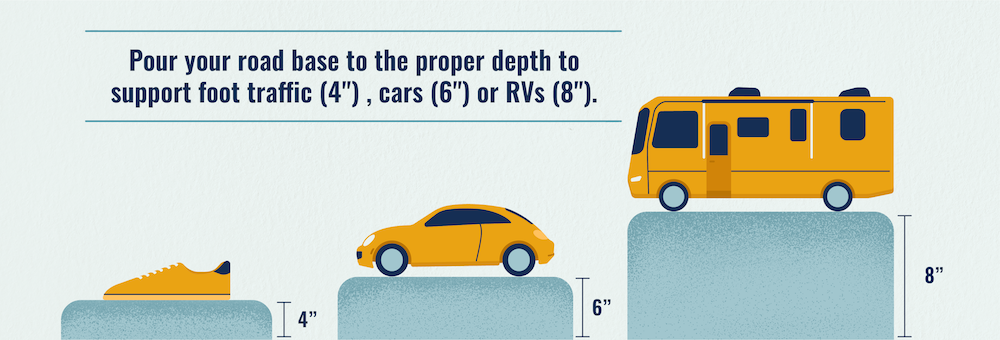
Now that your land has been properly prepped, information technology'southward time to lay the foundation for your pavers. Pour your Class Ii road base in increments of two inches, compacting twice with your plate compactor before pouring the adjacent two inches. Compacting all 4, 6 or 8 inches at the same time is not recommended, equally it will exit air gaps and tin pb to needed repairs downward the road.
The total required depth of route base depends on the corporeality of weight the area will need to support.
- For pedestrian foot traffic, iv inches of route base volition suffice.
- Six inches is needed for large backyard mowers and vehicles.
- RV areas require 8 inches of road base to support vehicle weight.
After laying the road base, hose it down and compact it until it reaches a compaction level of 95%. If y'all were to drive over the road base with a tractor at this bespeak, no tire marks would appear due to the route base being equally hard as a rock from compaction.
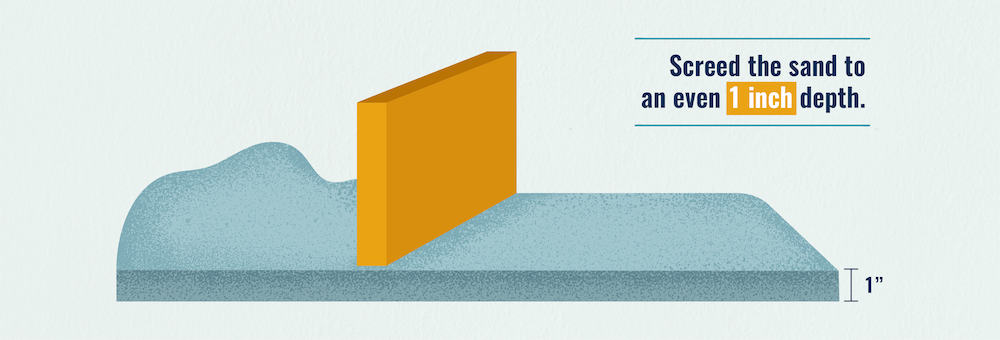
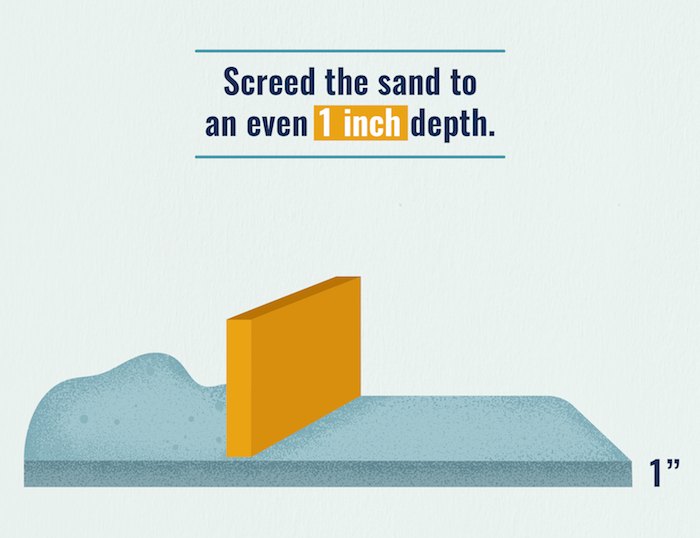
Pour and Screed the Sand
Place your screeding guides (1" pvc pipes) on top of the route base of operations and pour sharp angled bedding sand over the entire base. This is different than the round sand you would notice at your local beach. Information technology is sharp and angular, making it perfect for locking into paver joints.
Next, use your rake to roughly level the sand. Follow this upwardly by screeding the sand with a ii×4 to ensure an even 1-inch depth. Ensure that your screeded sand is level before moving on.
three. Lay Down Pavers
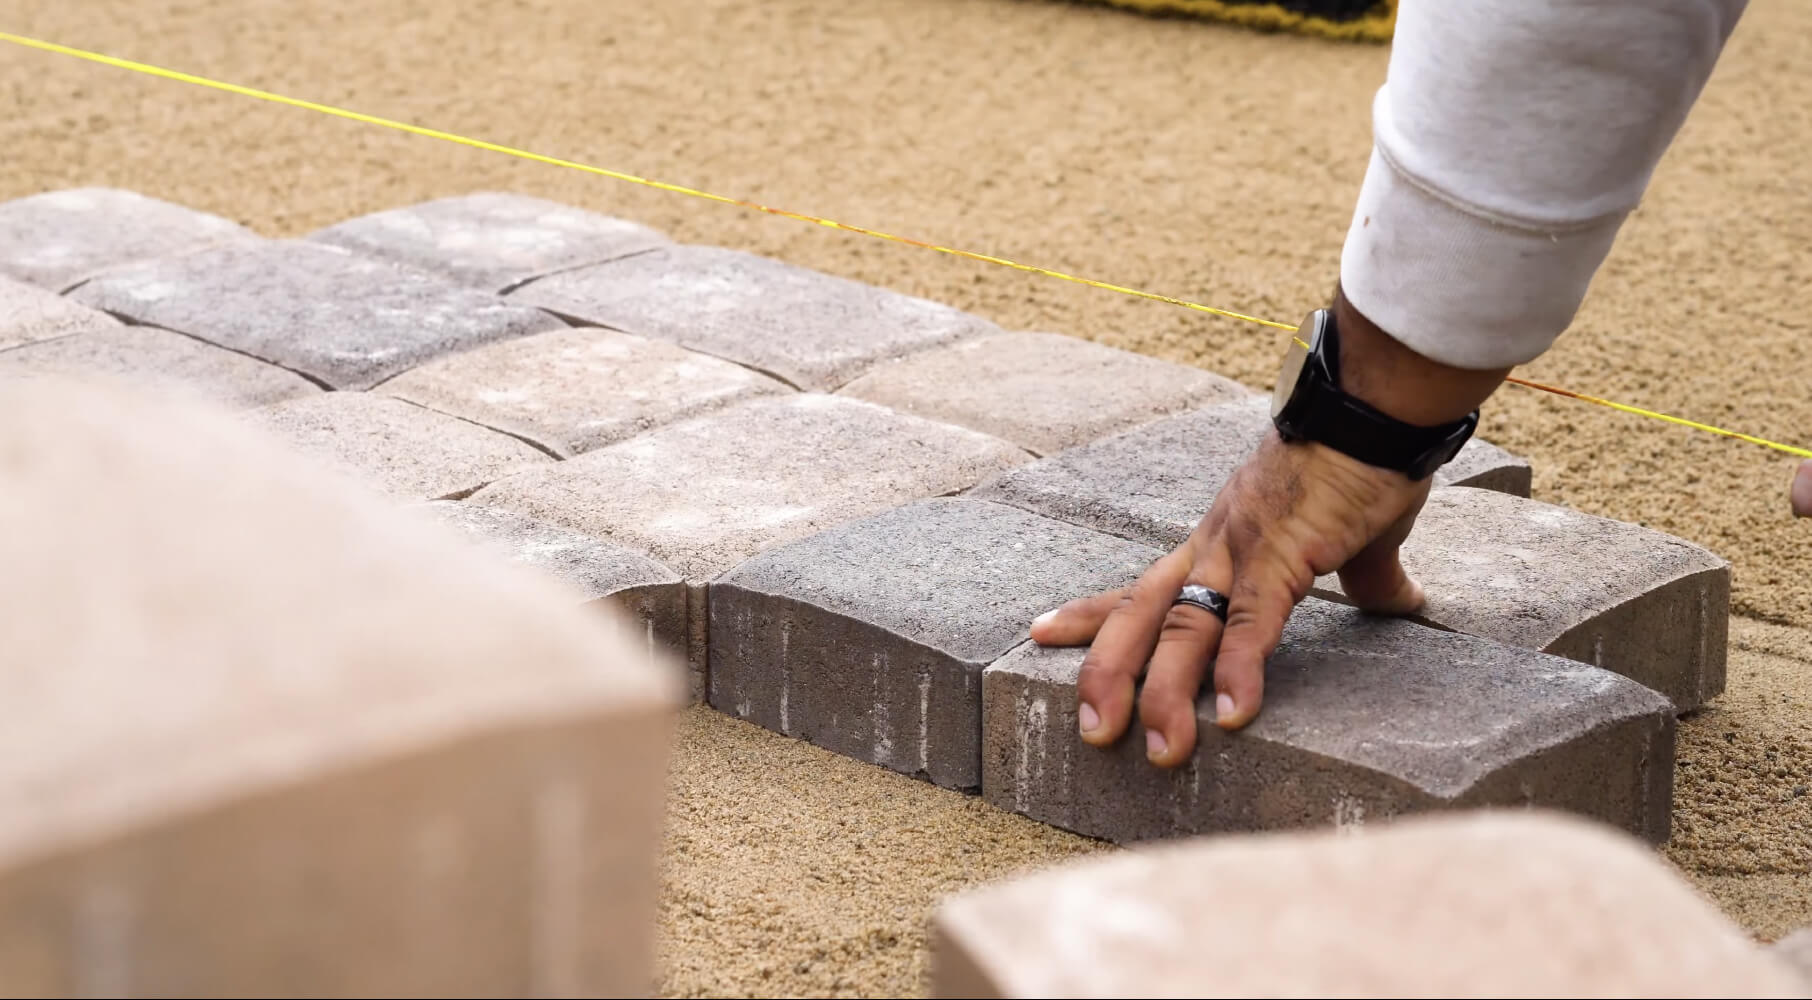
At present for the part yous likely imagined when planning your projection in the first identify. Information technology'due south time to lay your pavers. Based on your paver materials, there is a seemingly endless number of paver patterns to choose from. Lay the desired pattern of pavers before cutting any border stones. Exist sure to lay them directly down, and not kick or slide them into place which can disturb the sand bed.
Cut the Edge Stones
One time the basic field of pavers is established, mark the stones on the border. Now yous tin safely remove and wet saw them. Article of clothing eye and ear protection while using your round saw with a physical bract. Proceed in mind when cut edge stones to avoid sharp angles that can make mowing the adjacent lawn difficult.


four. Install Edging
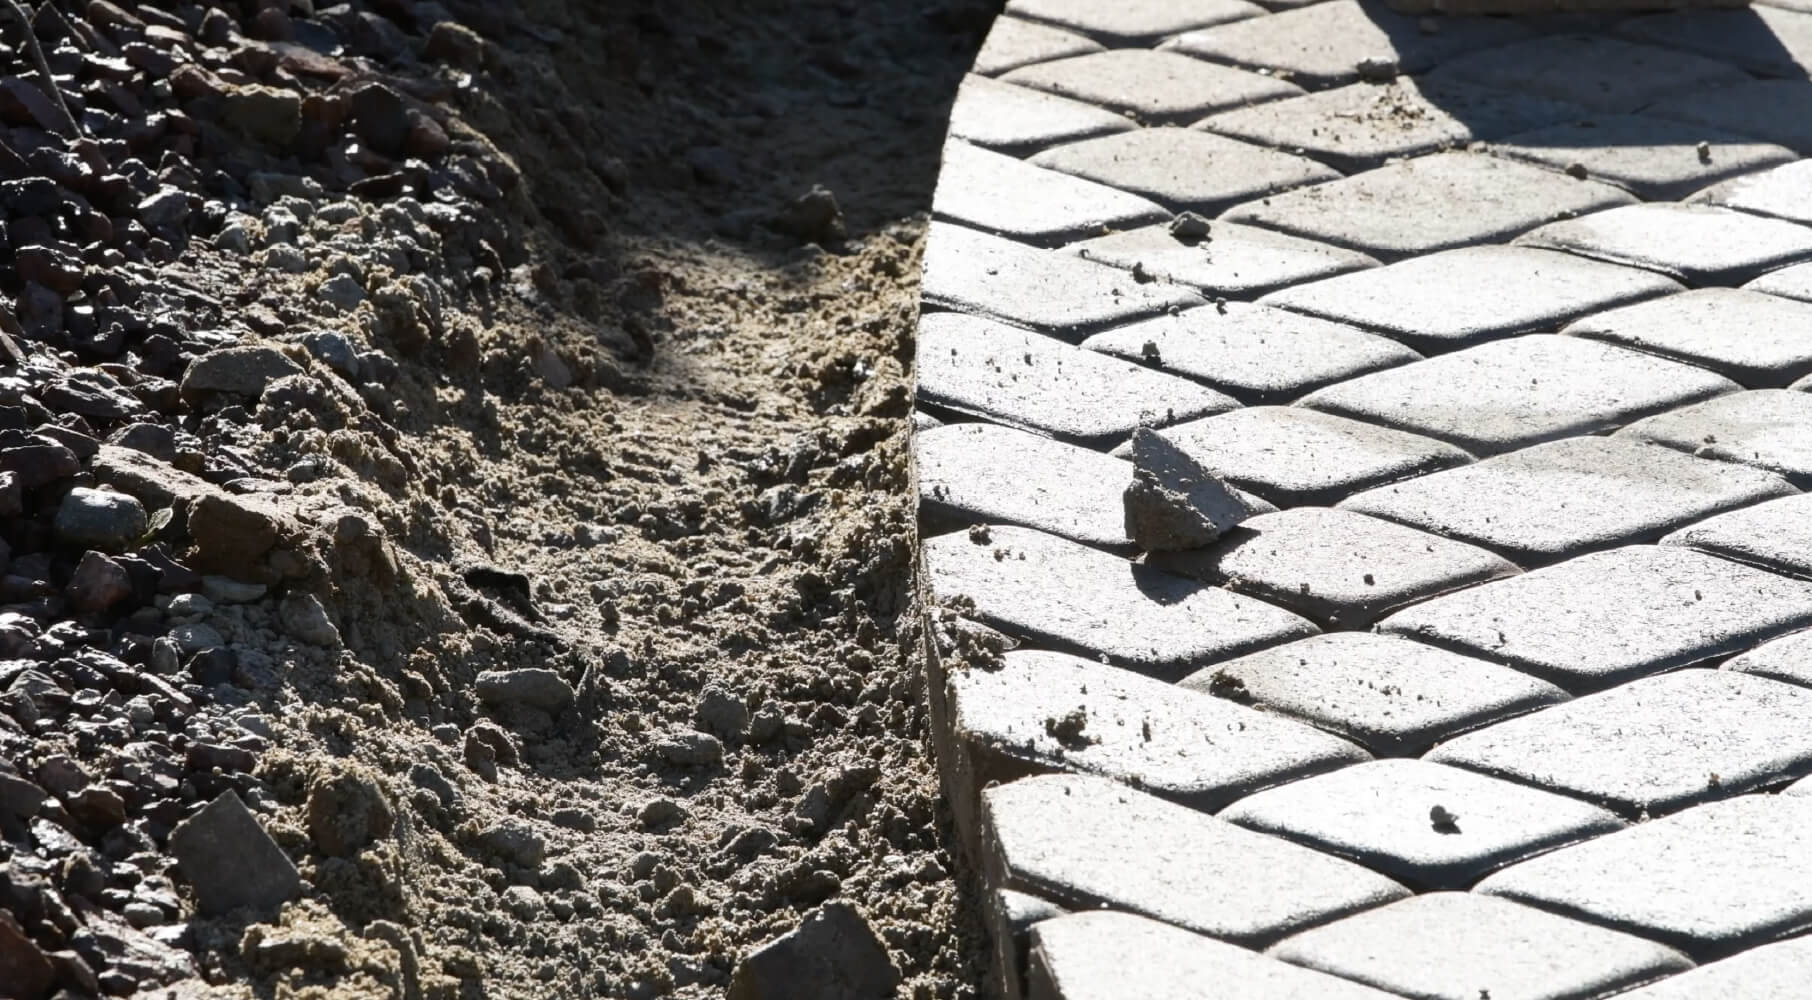
Trench the Border Stone Expanse
Earlier replacing the border stones, trench the areas that lay confronting grass, dirt or asphalt. Your trench depth should achieve the native soil (v ½ inches for a patio and vii ½ inches for a driveway) and extend the aforementioned width as your border rock.
Side by side, install proper bond beam footings into your trench. Rebar can be added for additional support and longevity (optional). Pour concrete, gear up your newly cutting border stones in place and tamp them downwards. This can upshot in excess concrete on the side of the border stones. Be sure to remove the excess concrete from the outside edges of your pavers for a clean, beautiful terminate.
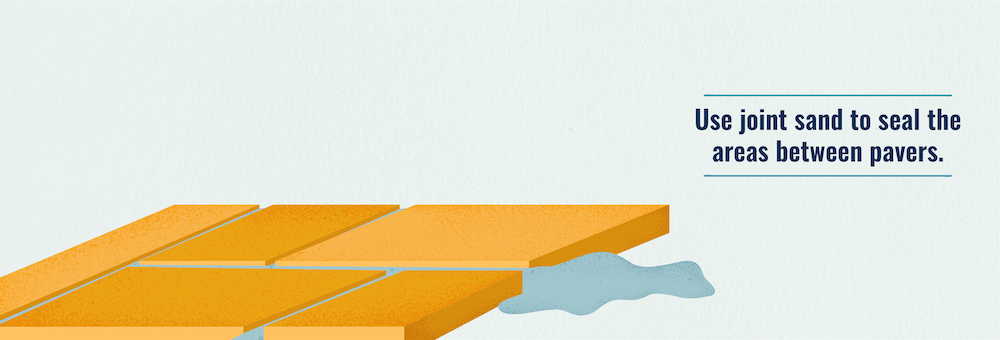
5. Add Articulation Sand and Meaty

Next, cascade joint sand or polymeric sand over the acme of the entire paved area until information technology reaches nigh ⅛ inch in a higher place the top of the pavers. Polymeric sand is typically used with large jointed pavers, and regular joint sand will suffice for smaller joints. Subsequently verifying that a pad is existence used on your plate compactor, tamp the sand downward. Failure to apply a pad will result in scratched pavers which will need to be replaced.

six. Clean and Seal
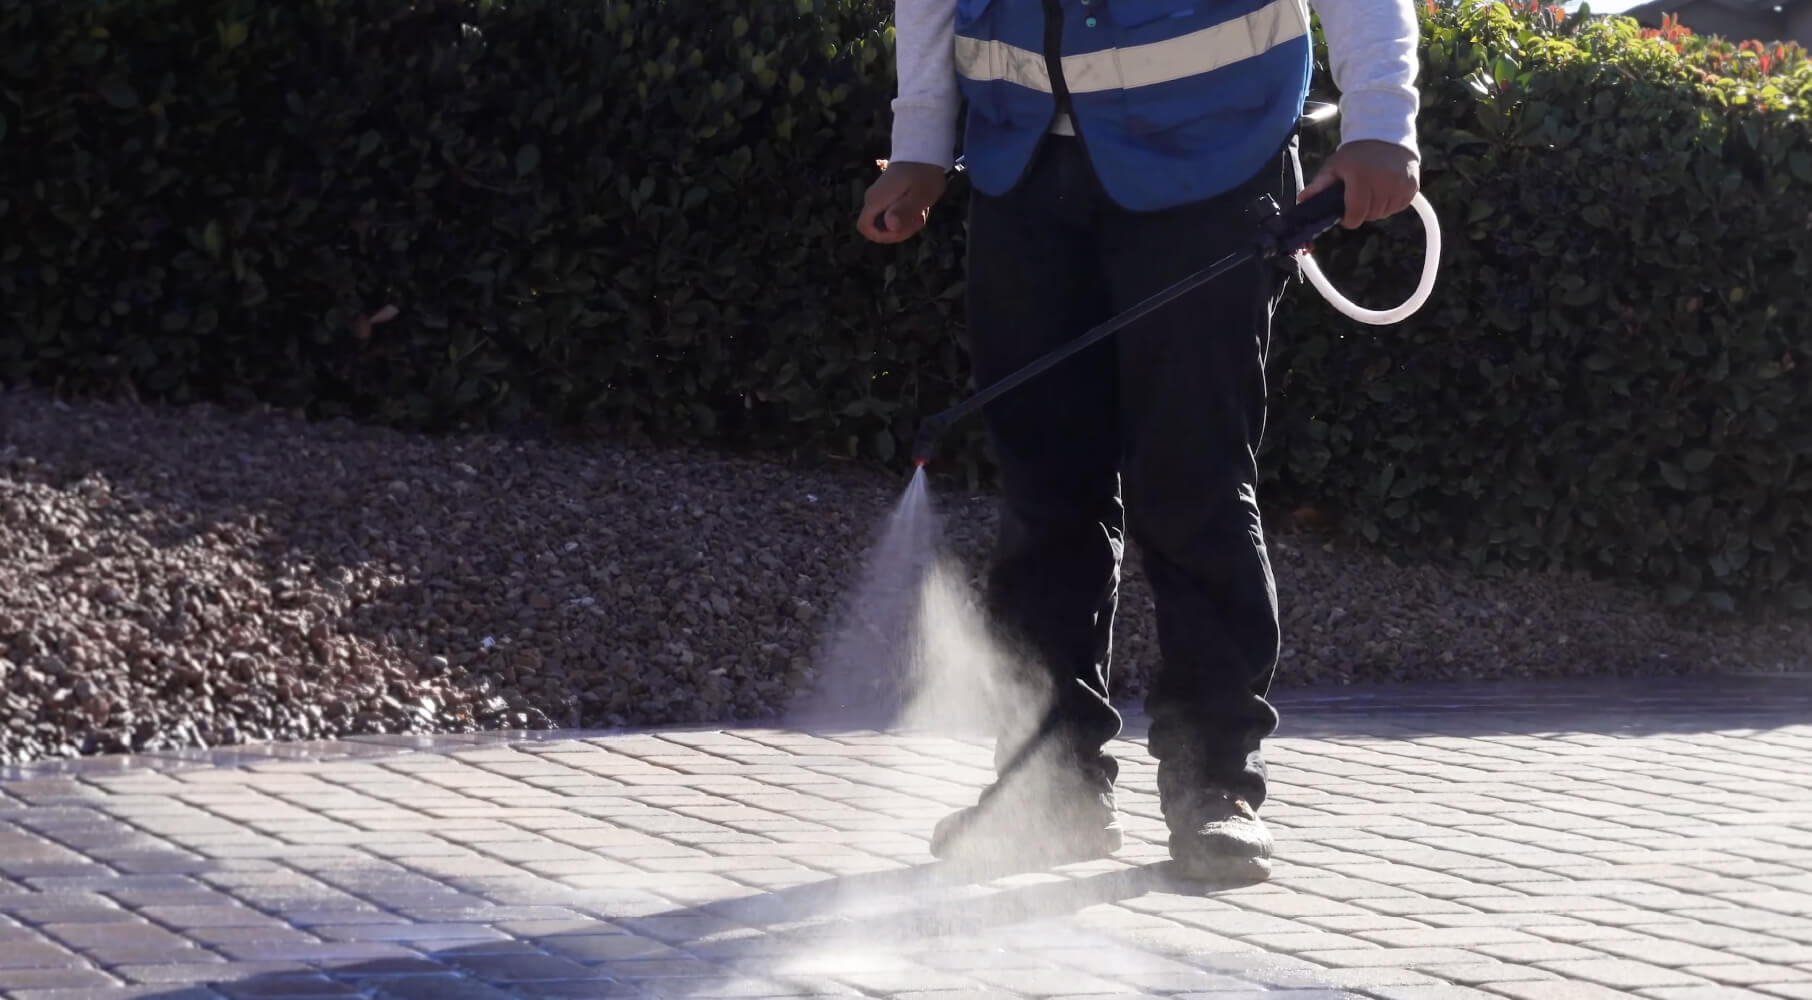
You lot're almost finished! Using a broom or leafage blower, clean up excess sand before watering downwards the entire paved area.
For polymeric sand applications, proper watering is essential for the sand to harden. The best way to water polymeric sand is to suit your hose nozzle to a soft shower and gently h2o the pavers until no more water will soak in. Information technology's of import to ensure all polymeric sand is washed off from paver tops to avoid an unsightly haze.
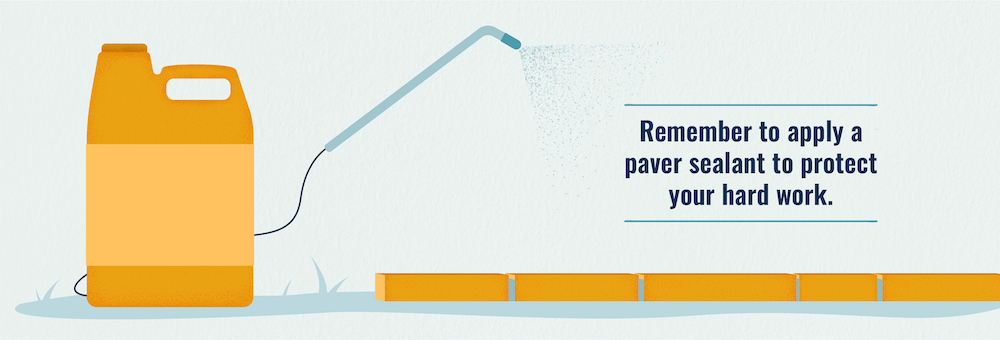
To help your pavers withstand the test of time, we e'er recommend sealing them with a quality product. After the area dries, apply your paver sealer using a spray applicator and your push broom. Be sure to plough off any automatic sprinklers and avoid moisture for the next 48 hours later on sealing your pavers.
Enjoy Your Make New Pavers!
Now information technology'due south time to pull upwards a chair, pour a cold glass of lemonade and admire your hard work. You lot just completed your very own DIY paver installation project at home! Retrieve, if you lot prefer leaving the heavy lifting (and digging, and paver laying) to the professionals, the team at Install-It-Direct is hither to help!
Paver Perfection
Our paver professionals will blueprint and build the patio, pathway, or driveway you lot've always dreamed of.
View Services

Source: https://www.installitdirect.com/learn/how-to-install-pavers/
Posted by: heardarithe.blogspot.com
0 Response to "How To Install Brick Pavers Youtube"
Post a Comment